Category Archives: Crafts

All things crafty!

CUNT

I’m doing a NSFW swap a friend is organizing on Facebook and this is what I came up with. It’s not really a super original concept to put a word like “cunt” on some floral or otherwise feminine background but I have all of this patterned fabric I never embroider on because I think it’s too distracting. I really like how this turned out though.


Home is where your mugs are.

I made this as a housewarming present for one of my darling friends, but I haven’t decided how to frame it yet so I haven’t given it to her (sorry Larissa, you’re going to see it here before real life!).


The teacup and wreath are from the Black Apple pattern pack from Sublime Stitching.

The back of this one also turned out very nice and clean before I got it dirty with an old gross iron.


Don’t worry, I got a clean iron soon after this picture was taken.

Reproductive Diagrams

These are two pieces I just finished baed on sketches I did of diagrams from my human sexuality class in college.

I’ve been meaning to stitch these for a long time, funny thing is, I’m not even sure where the diagrams are anymore so I can’t name some of the things that are numbered on the male cross section (my memory is the worst!).


I am also particularly proud of the backs of the work I’ve been doing lately. It makes me feel really good to have a nice clean back with no knots.


Here is the sketch they are from-


I tried to make them look as much like a sketch as I could. The drawing has black pen and colored pen. Since it is ink you can see the black from under the color and that was the hardest thing for me to figure out how to translate to embroidery. I ended up doing everything in the colors with two threads and then doing the black with one so you would see the color around it. You can click any of the photos to go to my Flickr page and see them in much bigger sizes.

Dresser to Credenza DIY

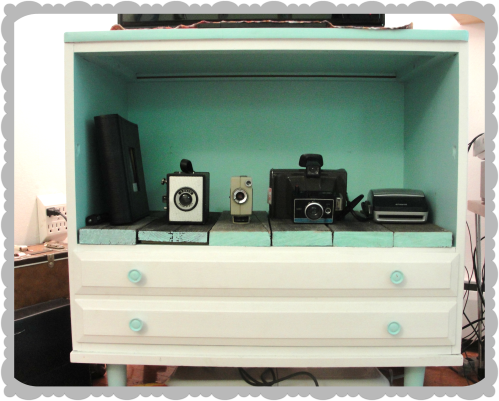
A few months ago I turned an old dresser into a credenza to put my t.v. on. Since I moved into Ryan’s house I’ve finally been able to use it and since I found my camera I have pictures too!

I didn’t take any before pictures but imagine that brown with two more drawers. I took the drawers out along with the stuff that holds drawers in ( I don’t have any idea what that’s called). I hand sanded everything, primed it, and painted it.

The wood there is old barn wood that was at my parents house. I used a hand saw to cut it and felt very strong for a few hours.

The credenza spent a few months living in my parents barn before I moved into the house with Ryan and there was room for it. Now I keep my camera collection on it, electronics cables in the drawer, and the t.v. and Wii on top.

Make Things: Spring Swap!


Spring has sprung, even if it’s a little confused about what kind of weather it’s supposed to bring with it.

Thankfully, March had 5 fridays so it was time for a Phat Quarter swap. The theme is “spring” and I had lots of wild ideas about making a really crazy weather forecast thing, but it wasn’t going to work out the way I wanted it to, so I took this as an opportunity to practice some stitches. I don’t often do fill stitches, because I  forget they don’t all have to be satin stitch to fill something well.

The S is just running stitch, the P is filled with french knots, and the R is filled with fern stitch.

The I is satin stitch. The N is a detached chain stitch (also known as lazy daisy) but I kept the entry and exit points wide so it would look scalloped. The G is done with running stitch.

I probably should have painted the back of this frame too, huh? Oh well! Having a frame with staples in it makes it easy to finish a piece. I cut a piece of thin cardboard to the size of the frame, wrapped the fabric around it and stuck it in the frame. Then I folded the fabric down and pushed the staples down.

I thought about putting a nice piece of fabric on it to really make it look “finished” but I don’t want it to be complicated if the recipient needs to take it out to wash it.

I did add some string so it can be easily hung up though.

I’m going to send it out in the mail tomorrow, but I wanted to show it off today!

What have you been making lately?
Make Things: Painted Frame

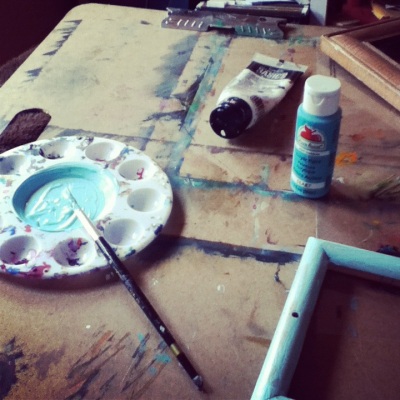
Today I got a late start, Ryan didn’t have to work until 1pm so we spent the morning watching TV. When I finally got home I painted a frame to prepare it for an embroidery swap. Here are some photos! It’s not exactly a tutorial because the only directions you really need are “step one: paint frame”. Haha

I started with some plain frames, white and teal paint, a brush, and something to put the paint on.

Next I mixed my paint up! When you’re mixing a color and white it’s best to start with the white and add the color a little at a time. This way you don’t end up with too much paint because you had to keep lightening it.

Next, and very importantly, paint your frame! Even more importantly, take an instagram picture while you wait for the first coat to dry.

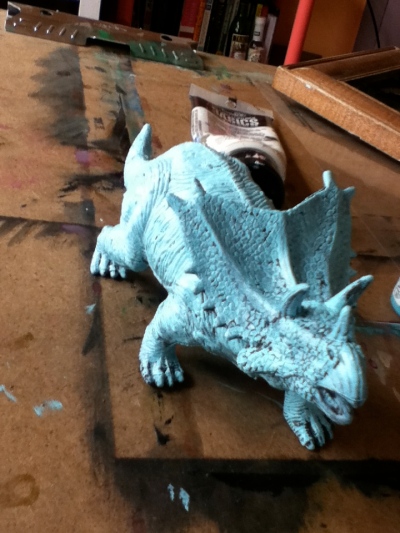
The last step for me was to use the extra paint on a plastic triceratops.

Wild Olive Stitch Swap!

I haven’t mentioned yet, but I’m taking part in the Wild Olive Stitch Swap!

I sent out my piece last week (but forgot to take a picture first, as I often do in swaps, oops!) and received a beautiful piece from my other partner on Tuesday!

I love the design that she chose to stitch for me, a little bird with a cage with a button on top! I love it!! She was sweet enough to also send along some really pretty thread, a great Burts Bee’s chapstick, and some yummy chocolate as well as a lovely postcard.

I love doing swaps because you get to connect to people all over the world. My piece came from Arizona and I sent my work to Australia! It’s always cool filling out the customs form, I don’t know why but I think it’s such a novelty.

This March has a 5th Friday coming up, so if I’m lucky there will be another Phat Quarter swap coming up!

Paint Chip Bunting

It was gorgeous out all last week so on Thursday I got to work and made some bunting to decorate my room. I really like how it turned out and I think it has a nice quality of looking “DIY” and handmade without looking crappy (not that anything any of us ever makes looks crappy, haha).

I started with a handful of paint sample cards I got at the hardware store down the road. if you want each triangle to be one color you should get the cards with larger squares of color (the bunting above is actually the in-between parts of the triangles I cut). The bigger the square, the bigger your triangle can be without words on it. I didn’t mind having a little bit of the color names left, so I just cut them as big as I could.

Next I took a thick thread meant for sewing buttons and hot glued it to the back of each triangle. Tape would work just as well if you don’t have hot glue. Any other kind of string or ribbon will work fine too- this is a very versatile project!

I would consider this for wedding decoration, easy to sit down with friends and make a lot of it some afternoon.

(If I were better at staging my photos I would have backed the cars out of the frame, oh well!)

After taking these pictures outside where you can actually see the colors I hung them up in my room. I took pictures but my orange room makes everything orange, see for yourself-

and that’s after lightening it!

I actually really like the duel color bunting I made with the leftover triangle parts (see the first picture). It says to me “I know I’m made out of paint samples, and I’m not trying to fool anyone.”

Mocking Jay Patches

Ryan bought the first book in the Hunger Games series with a gift card he got for the holidays. He read it quickly and then debated getting the second one in hardcover vs. waiting for the paperback. I told him he should wait because it would be cheaper. He bought it anyway and after having read them I understand why!

If you want to hear my feelings on the Hunger Games series (and oh do I have feelings!) you can see my accidental book report I wrote after finishing the third book.

The symbol on the patch I made is a mockingjay. I don’t want to give any spoilers so I won’t explain it any more, but if you read any of the books you’ll understand.

This is the first time I’ve ever done a stencil with more than one layer. The stencil wasn’t perfect but it worked well enough. I did the bird, arrow, and circle in separate parts.

I only made two patches, one for myself and one for Ryan, but I may make more if anyone wants one.

I’d like to try and make a pin as well, perhaps out of a plastic lid of some sort. It wouldn’t be fancy but it would be free, and that’s my favorite kind of thing.

The movie comes out tomorrow (or just the first book) but I’m waiting to go on Sunday with Ryan. Don’t worry I’ll let you know what I thought of it!

Make Things: More Scarves

For the holidays my sister got me some beautiful yarn. It’s 100% wool, by Quince & Co. The color is Bird’s Egg and I just love that they name the different thicknesses of wool after different birds. This is Puffin, a chunky wool. My how I love chunky wool!

I had it sitting in my stash for months waiting for the perfect project to arise, but since it was getting to be the end of February I decided I needed to make something soon!

I cast on 26 and did a simple seed stitch until I ran out of yarn then I did a three needle bind off (my favorite way to join a scarf like this one). This took two skeins   and ended up being exactly the right size.

The color is more like the first two pictures, the second turned out very blue. It’s definitely a robin’s egg color, which if you haven’t guessed, is one of my favorite colors. I’m glad I finished it so quickly because it’s been warm out these past few days. I hope I get some wear out of it before spring really gets here!

What do you knit once it gets warm out?